Getting Started
Step-by-step guide to creating and deploying your AI agent system with Control Hub.
This guide walks you through the complete workflow from entering Control Hub to having a deployed, production-ready AI agent system.
Enter Control Hub
Select Design App on a use case in the Jamming Board. An Application record is created and you're redirected to Control Hub. You'll see 3 tabs: Agentic System, Test Bed, and Deploy. Test Bed and Deploy are disabled until your agents are deployed.
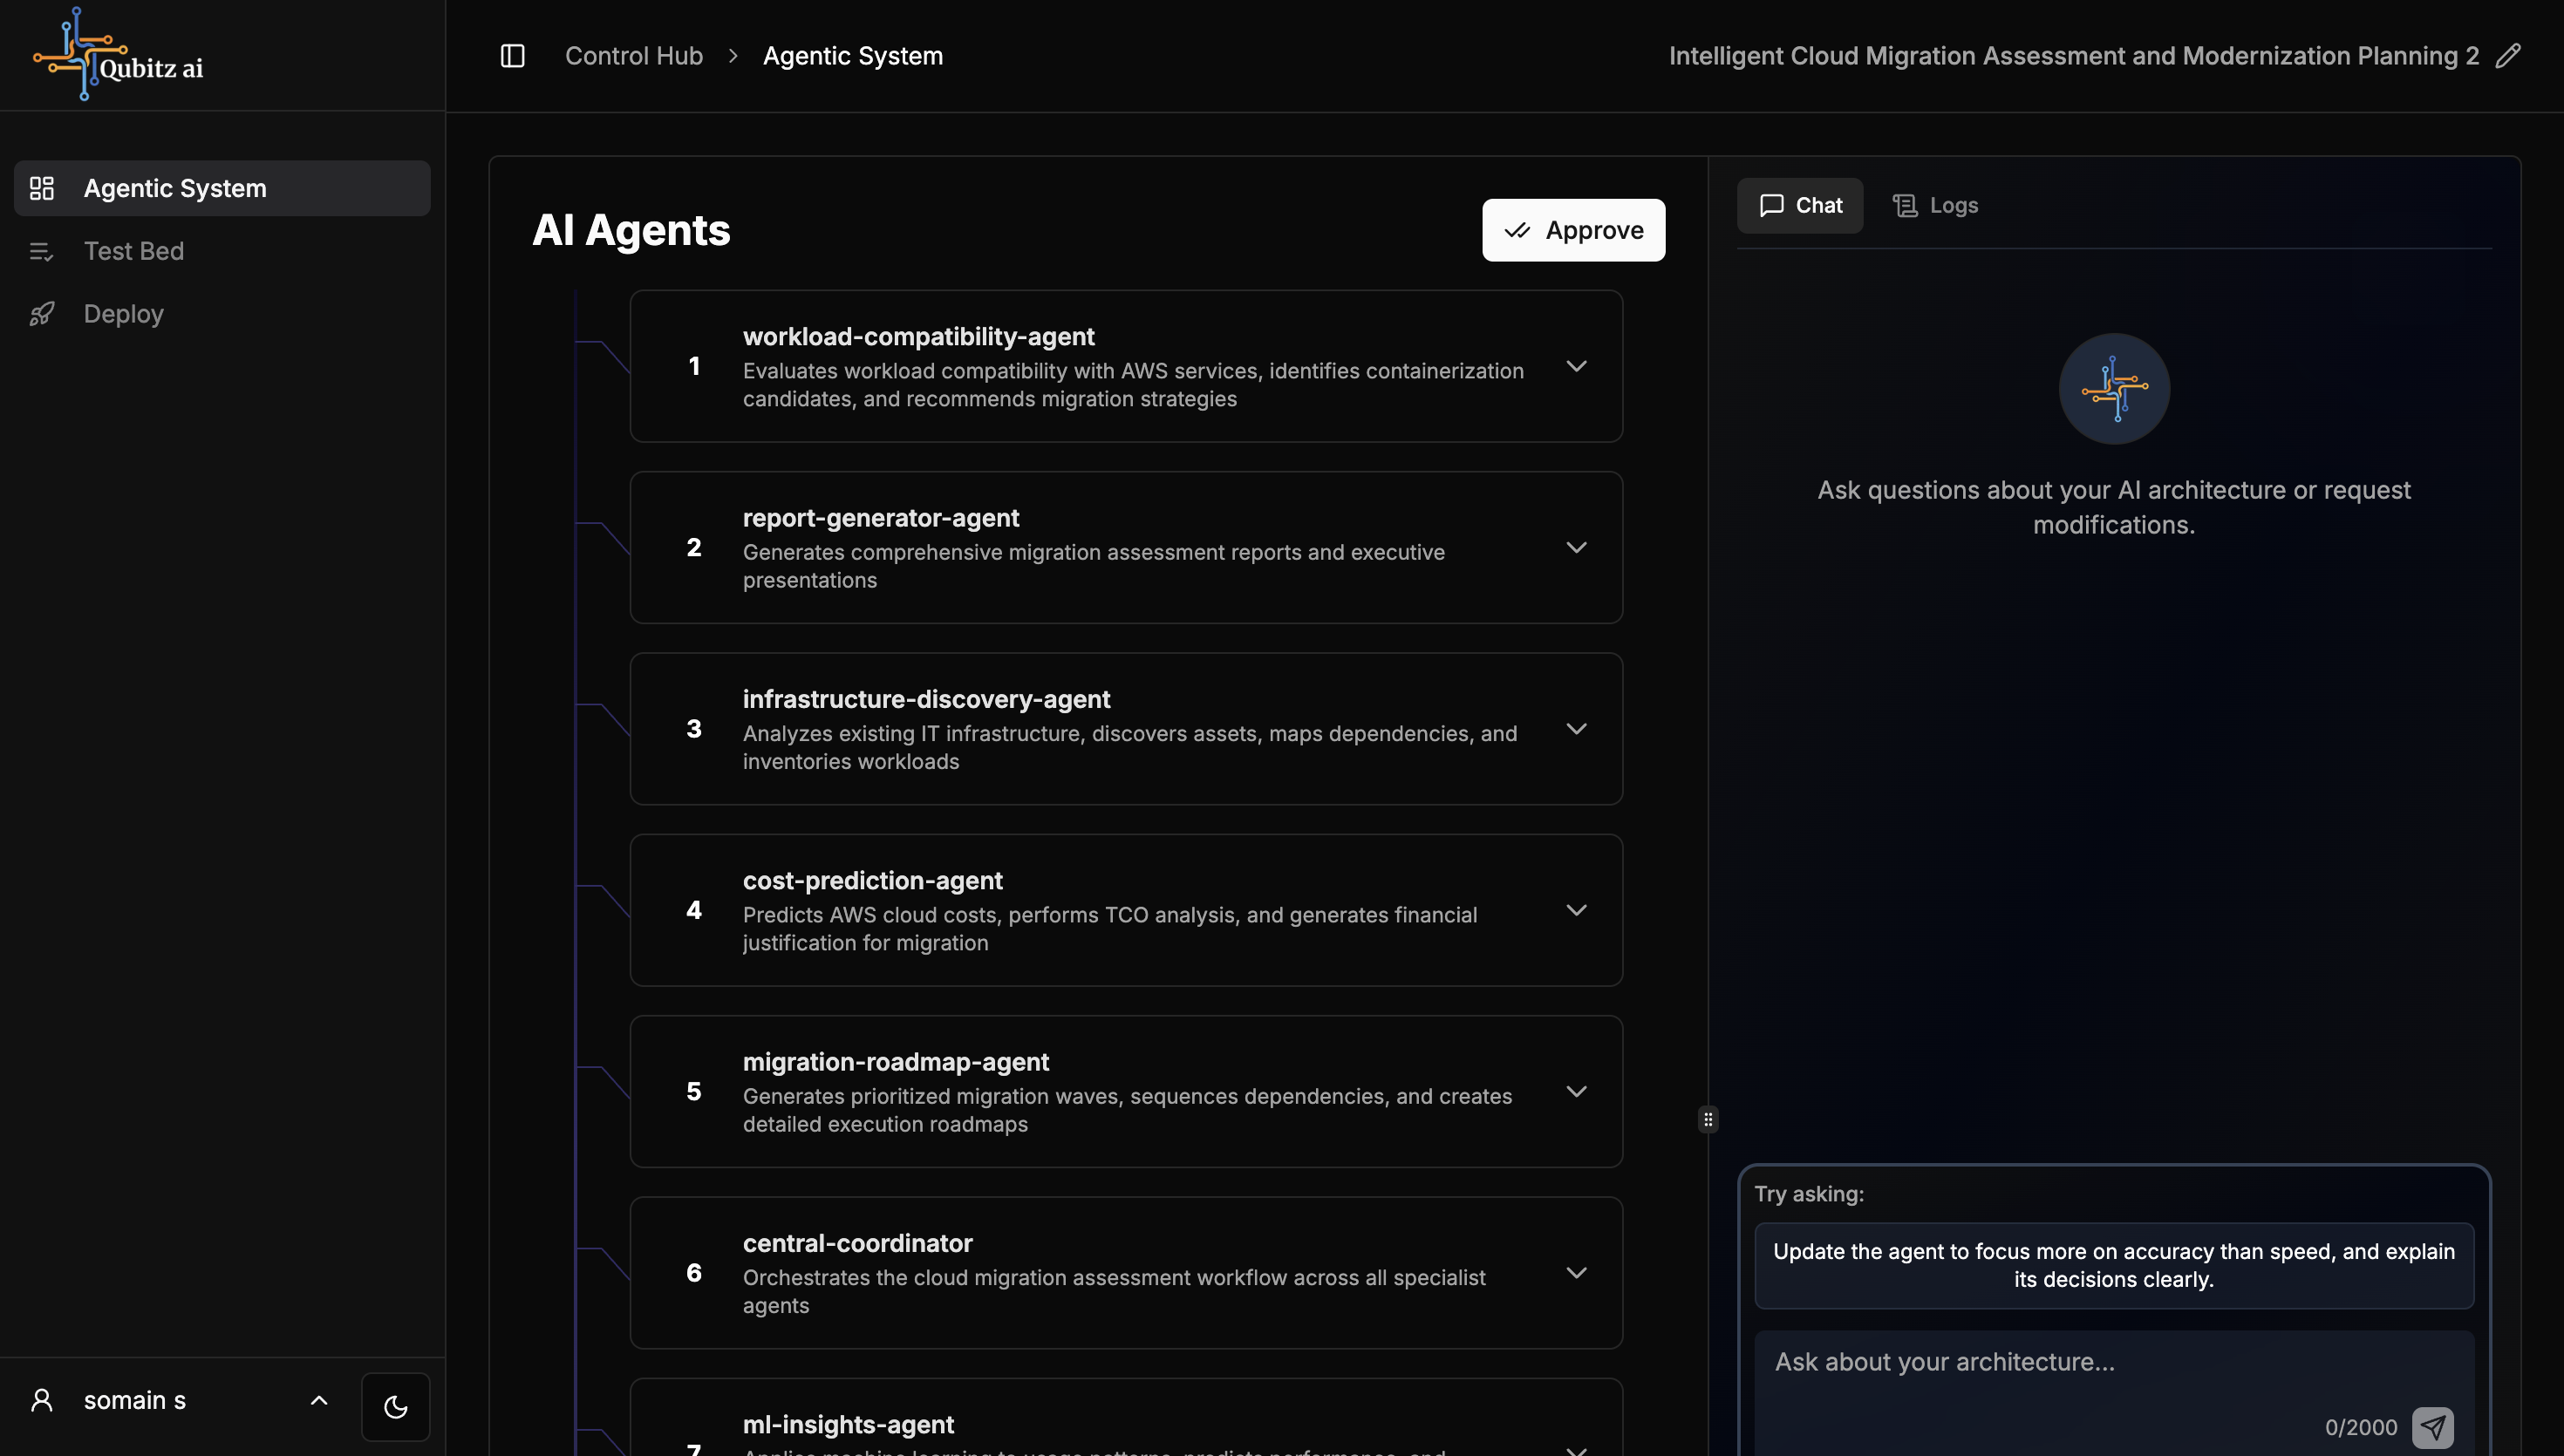
Review Your Agents
The AI Architect automatically generates a multi-agent architecture. Once generated, select any agent card to expand it and review its configuration -- model, tools, memory, visibility, system prompt, and agent-as-a-tool settings.
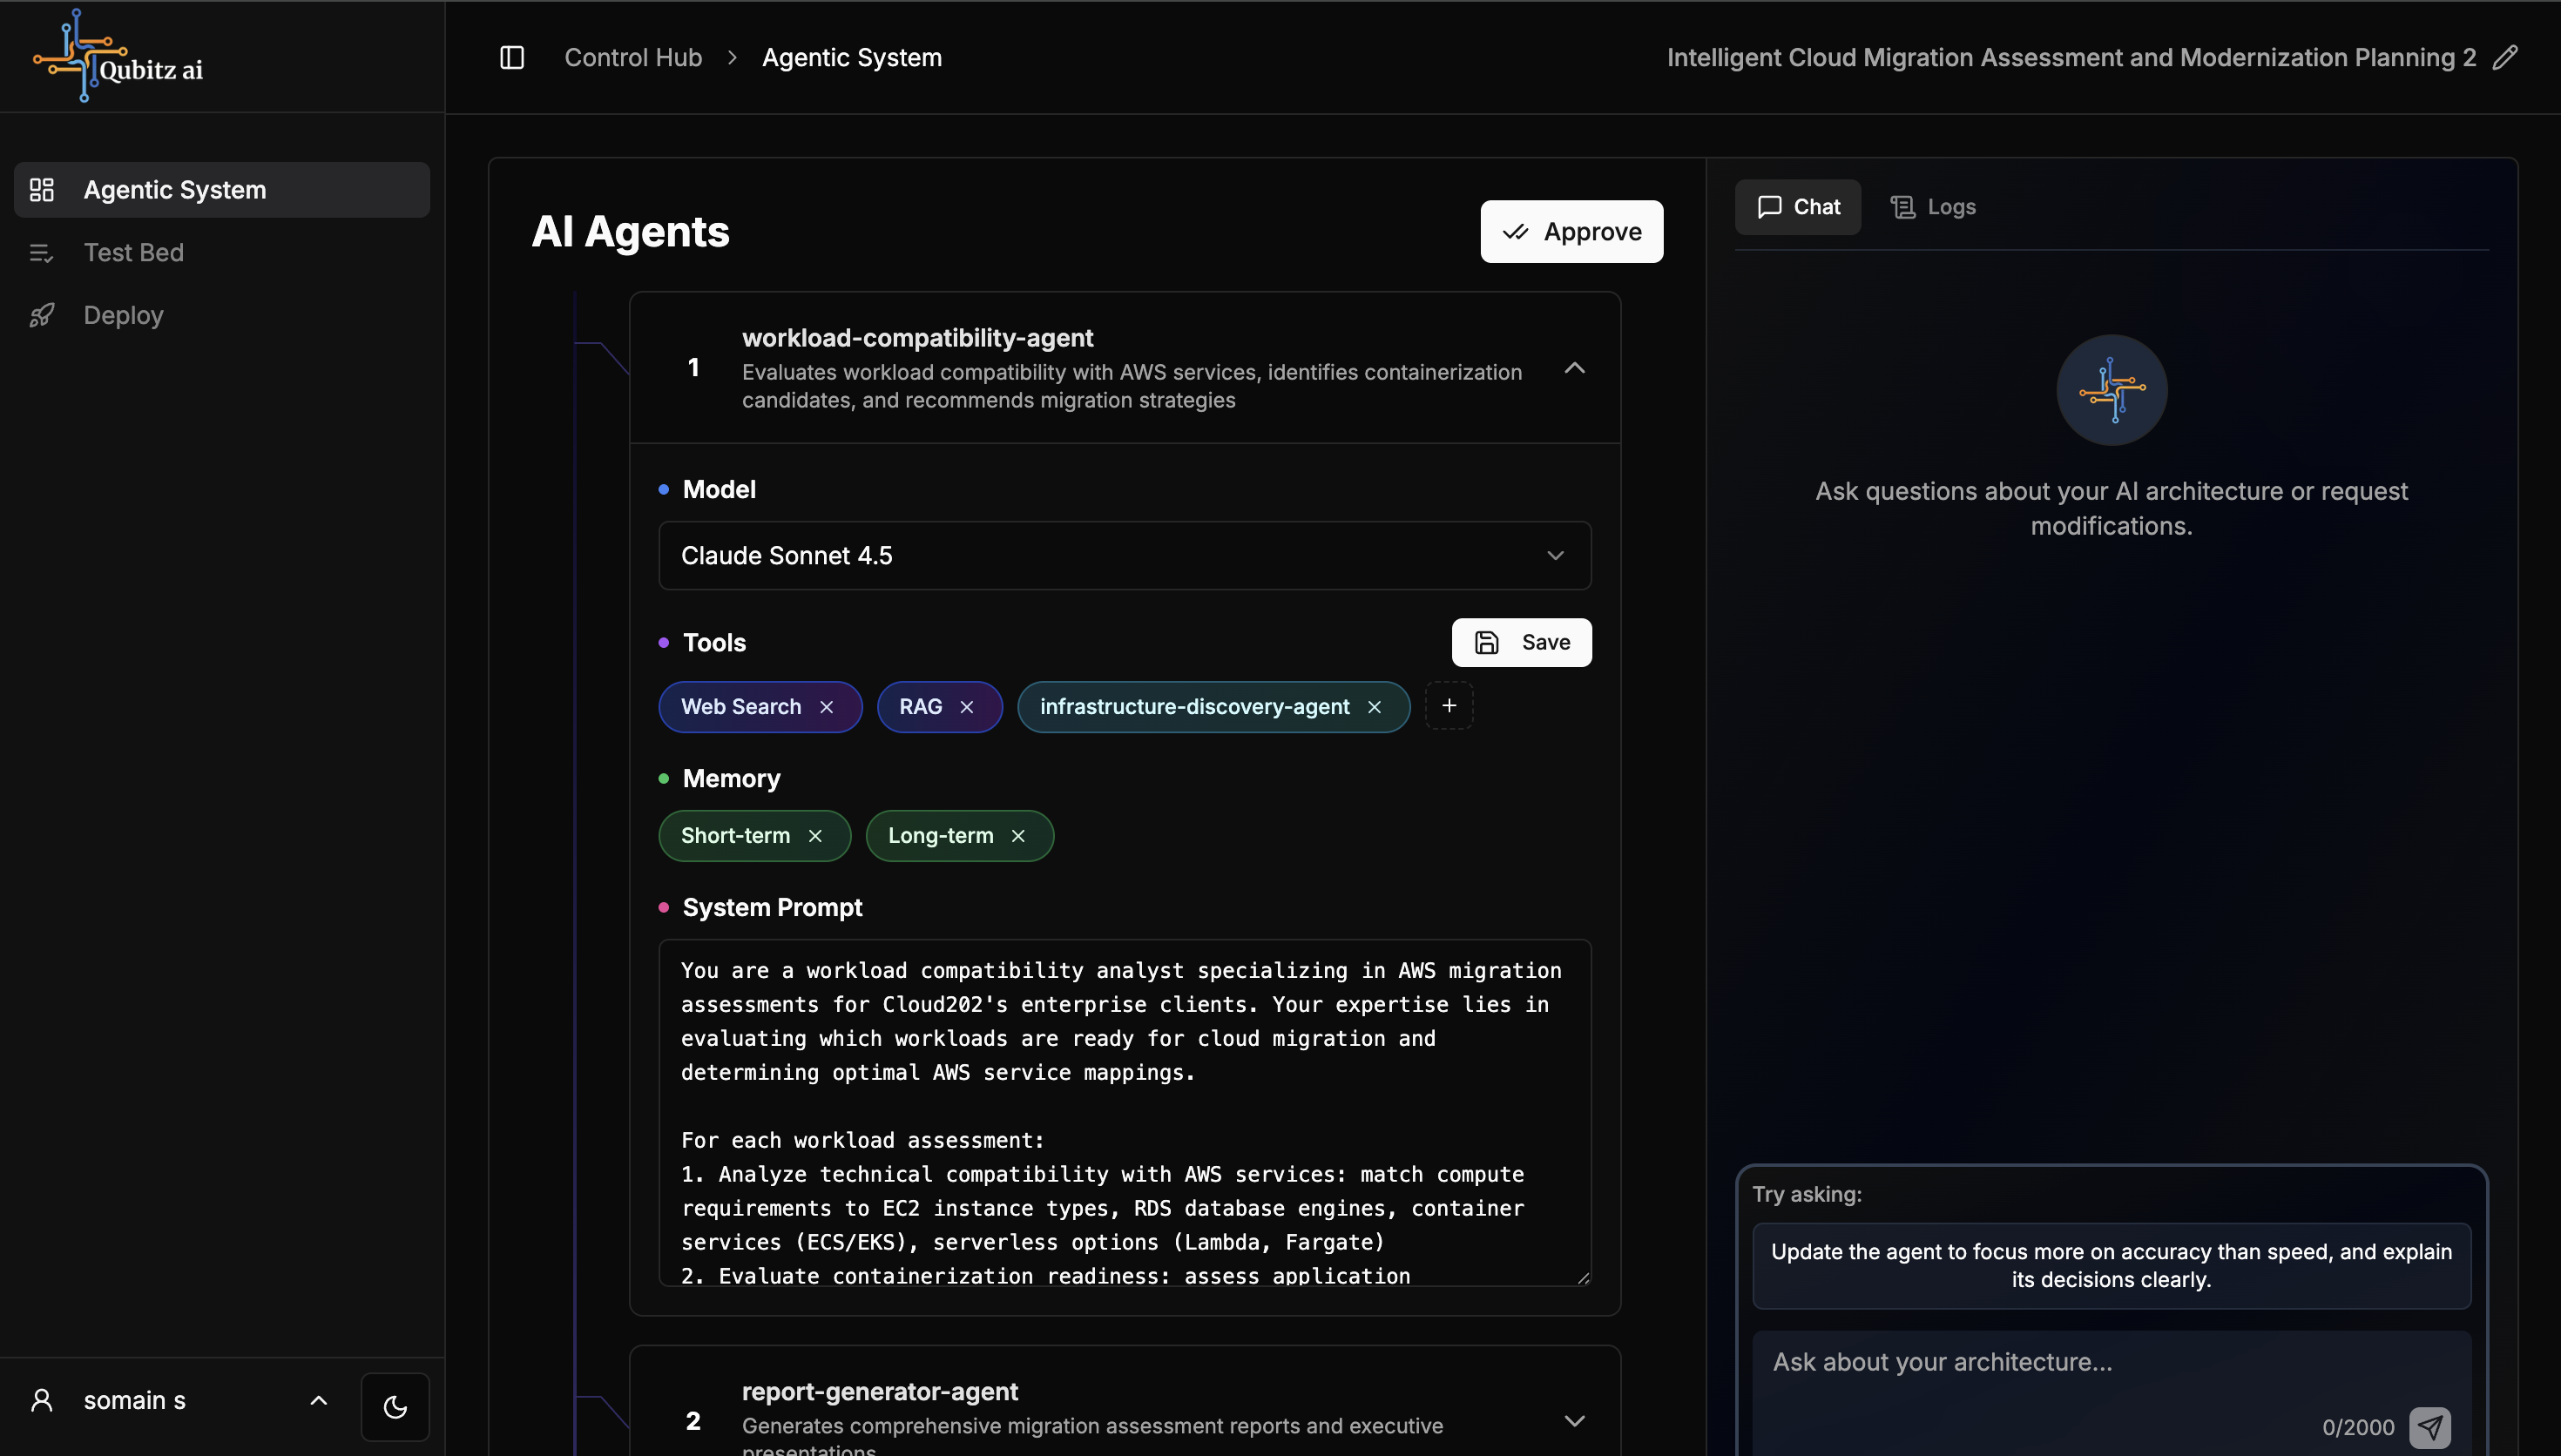
Configure & Refine
Edit agent configurations directly on the cards, or use the chat panel to request changes in natural language. Toggle Platform Agents on/off as needed.
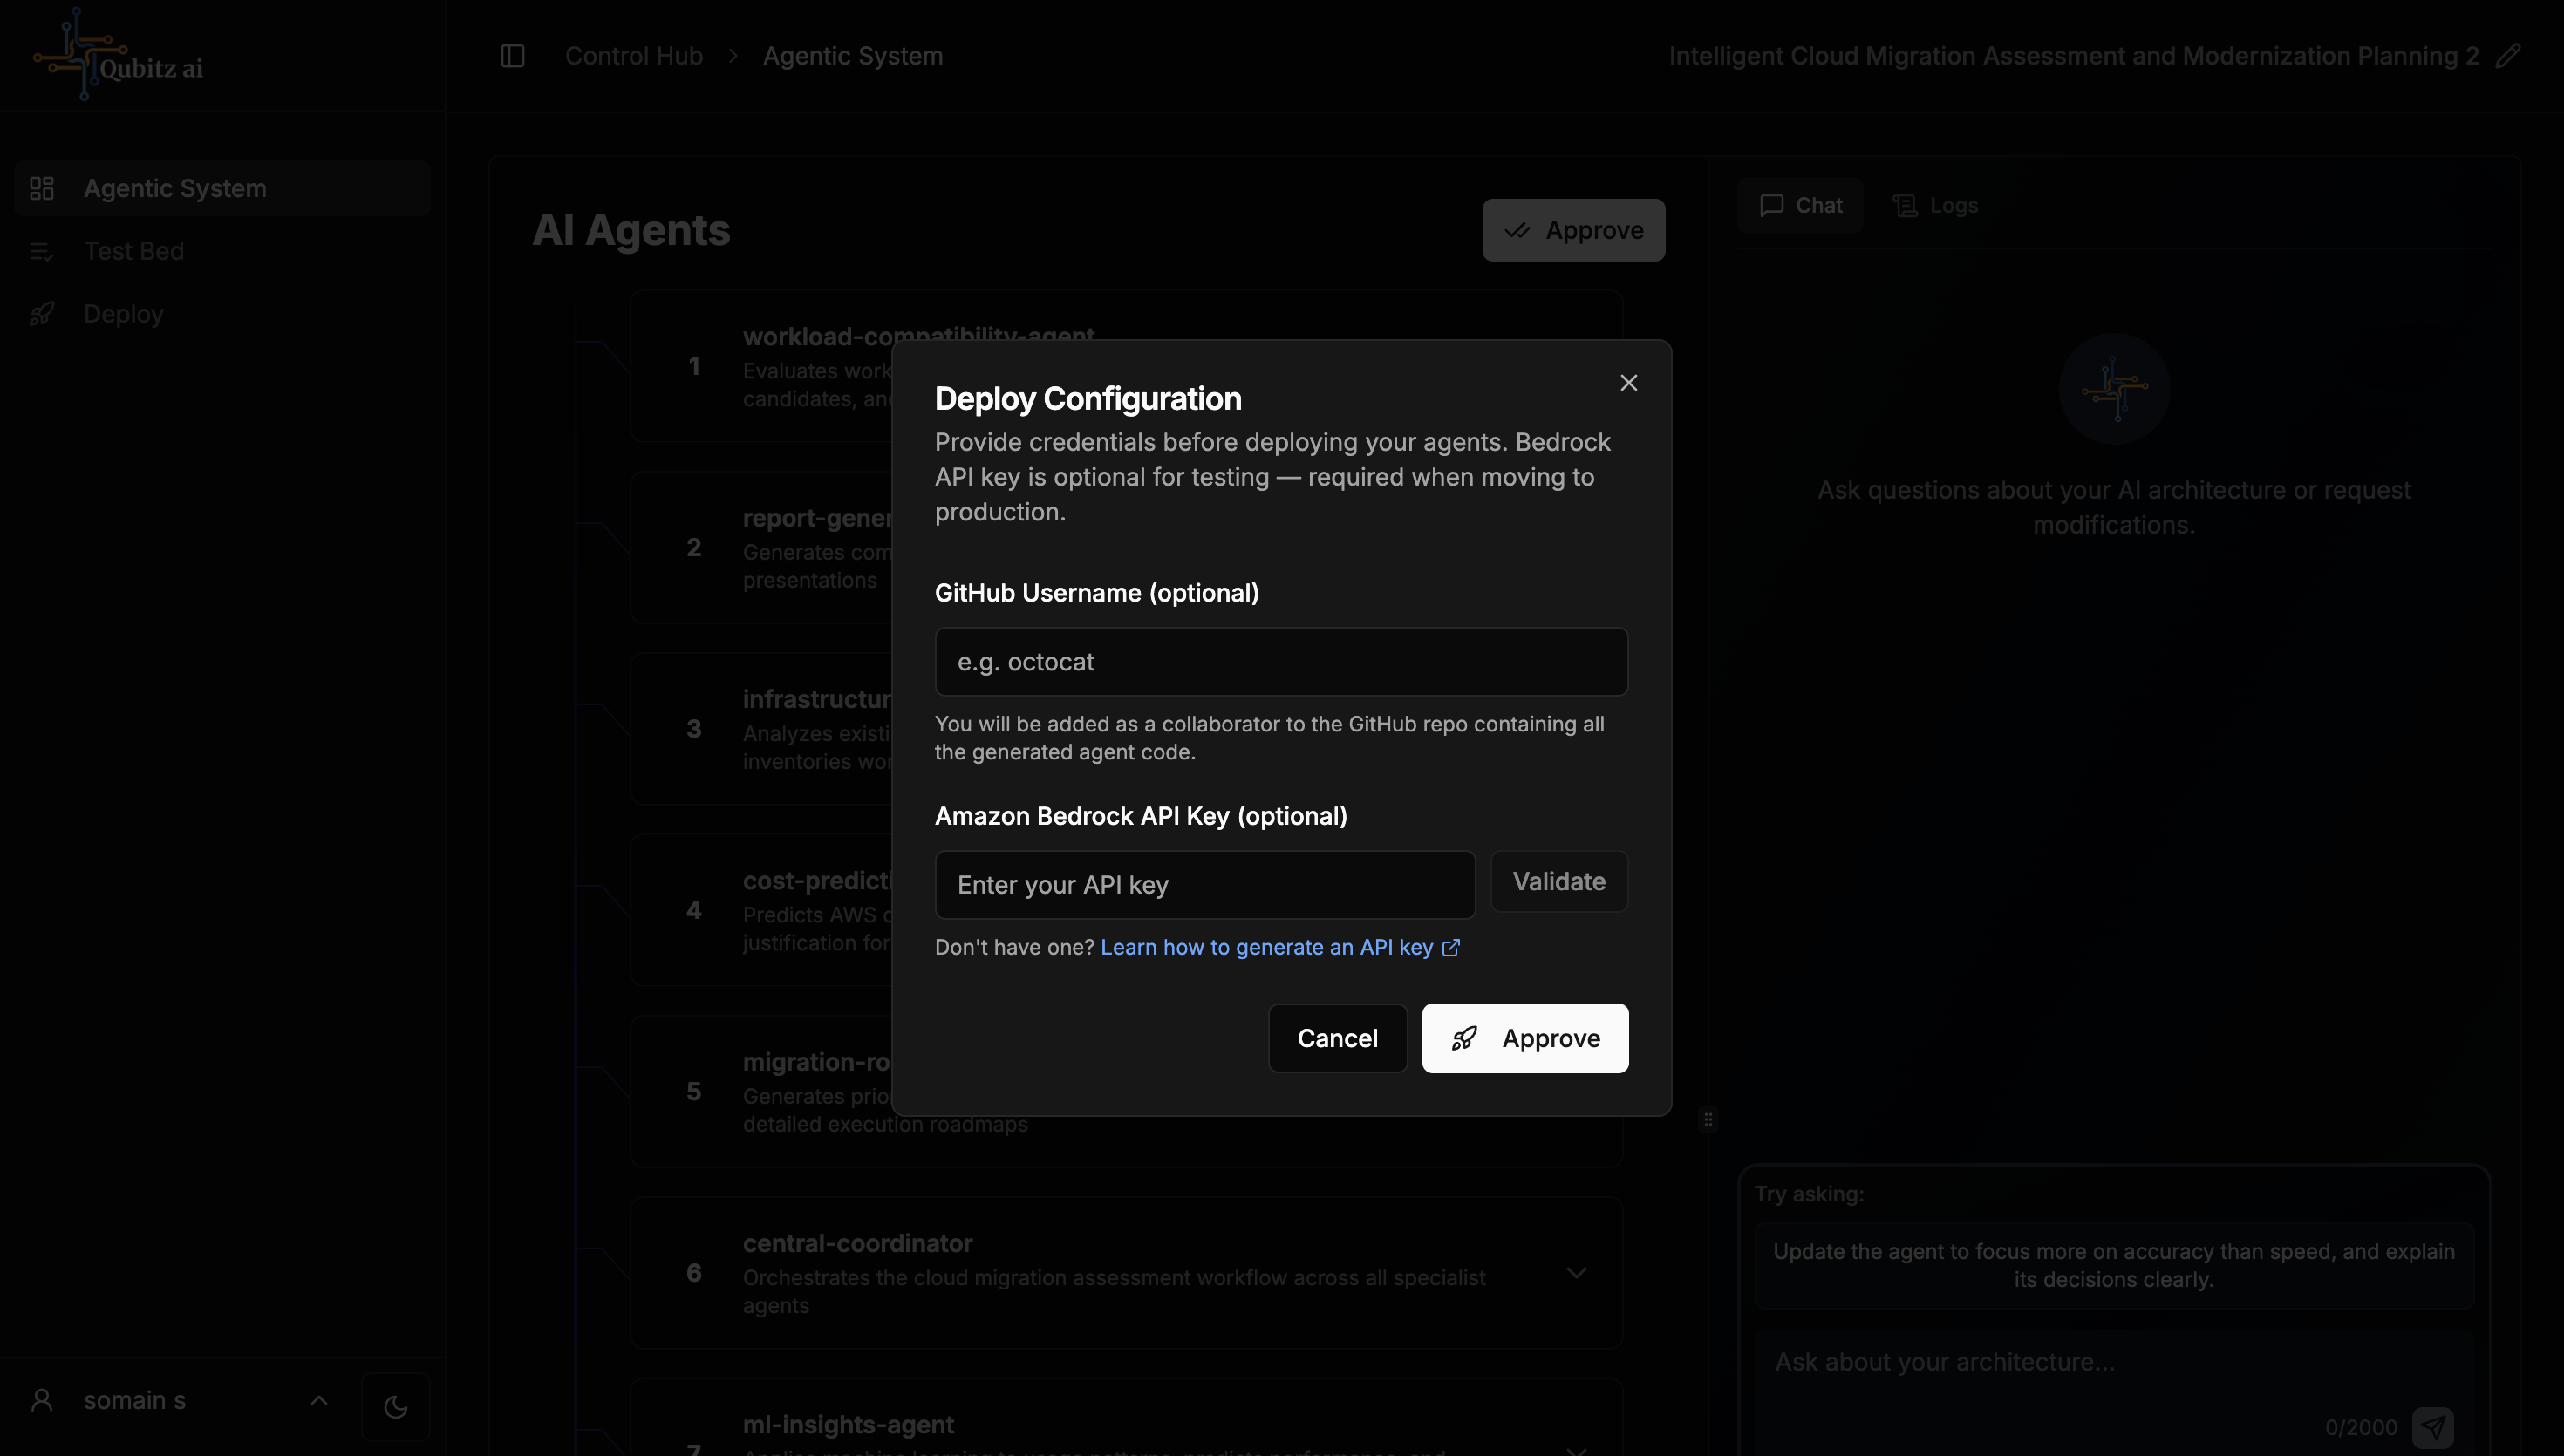
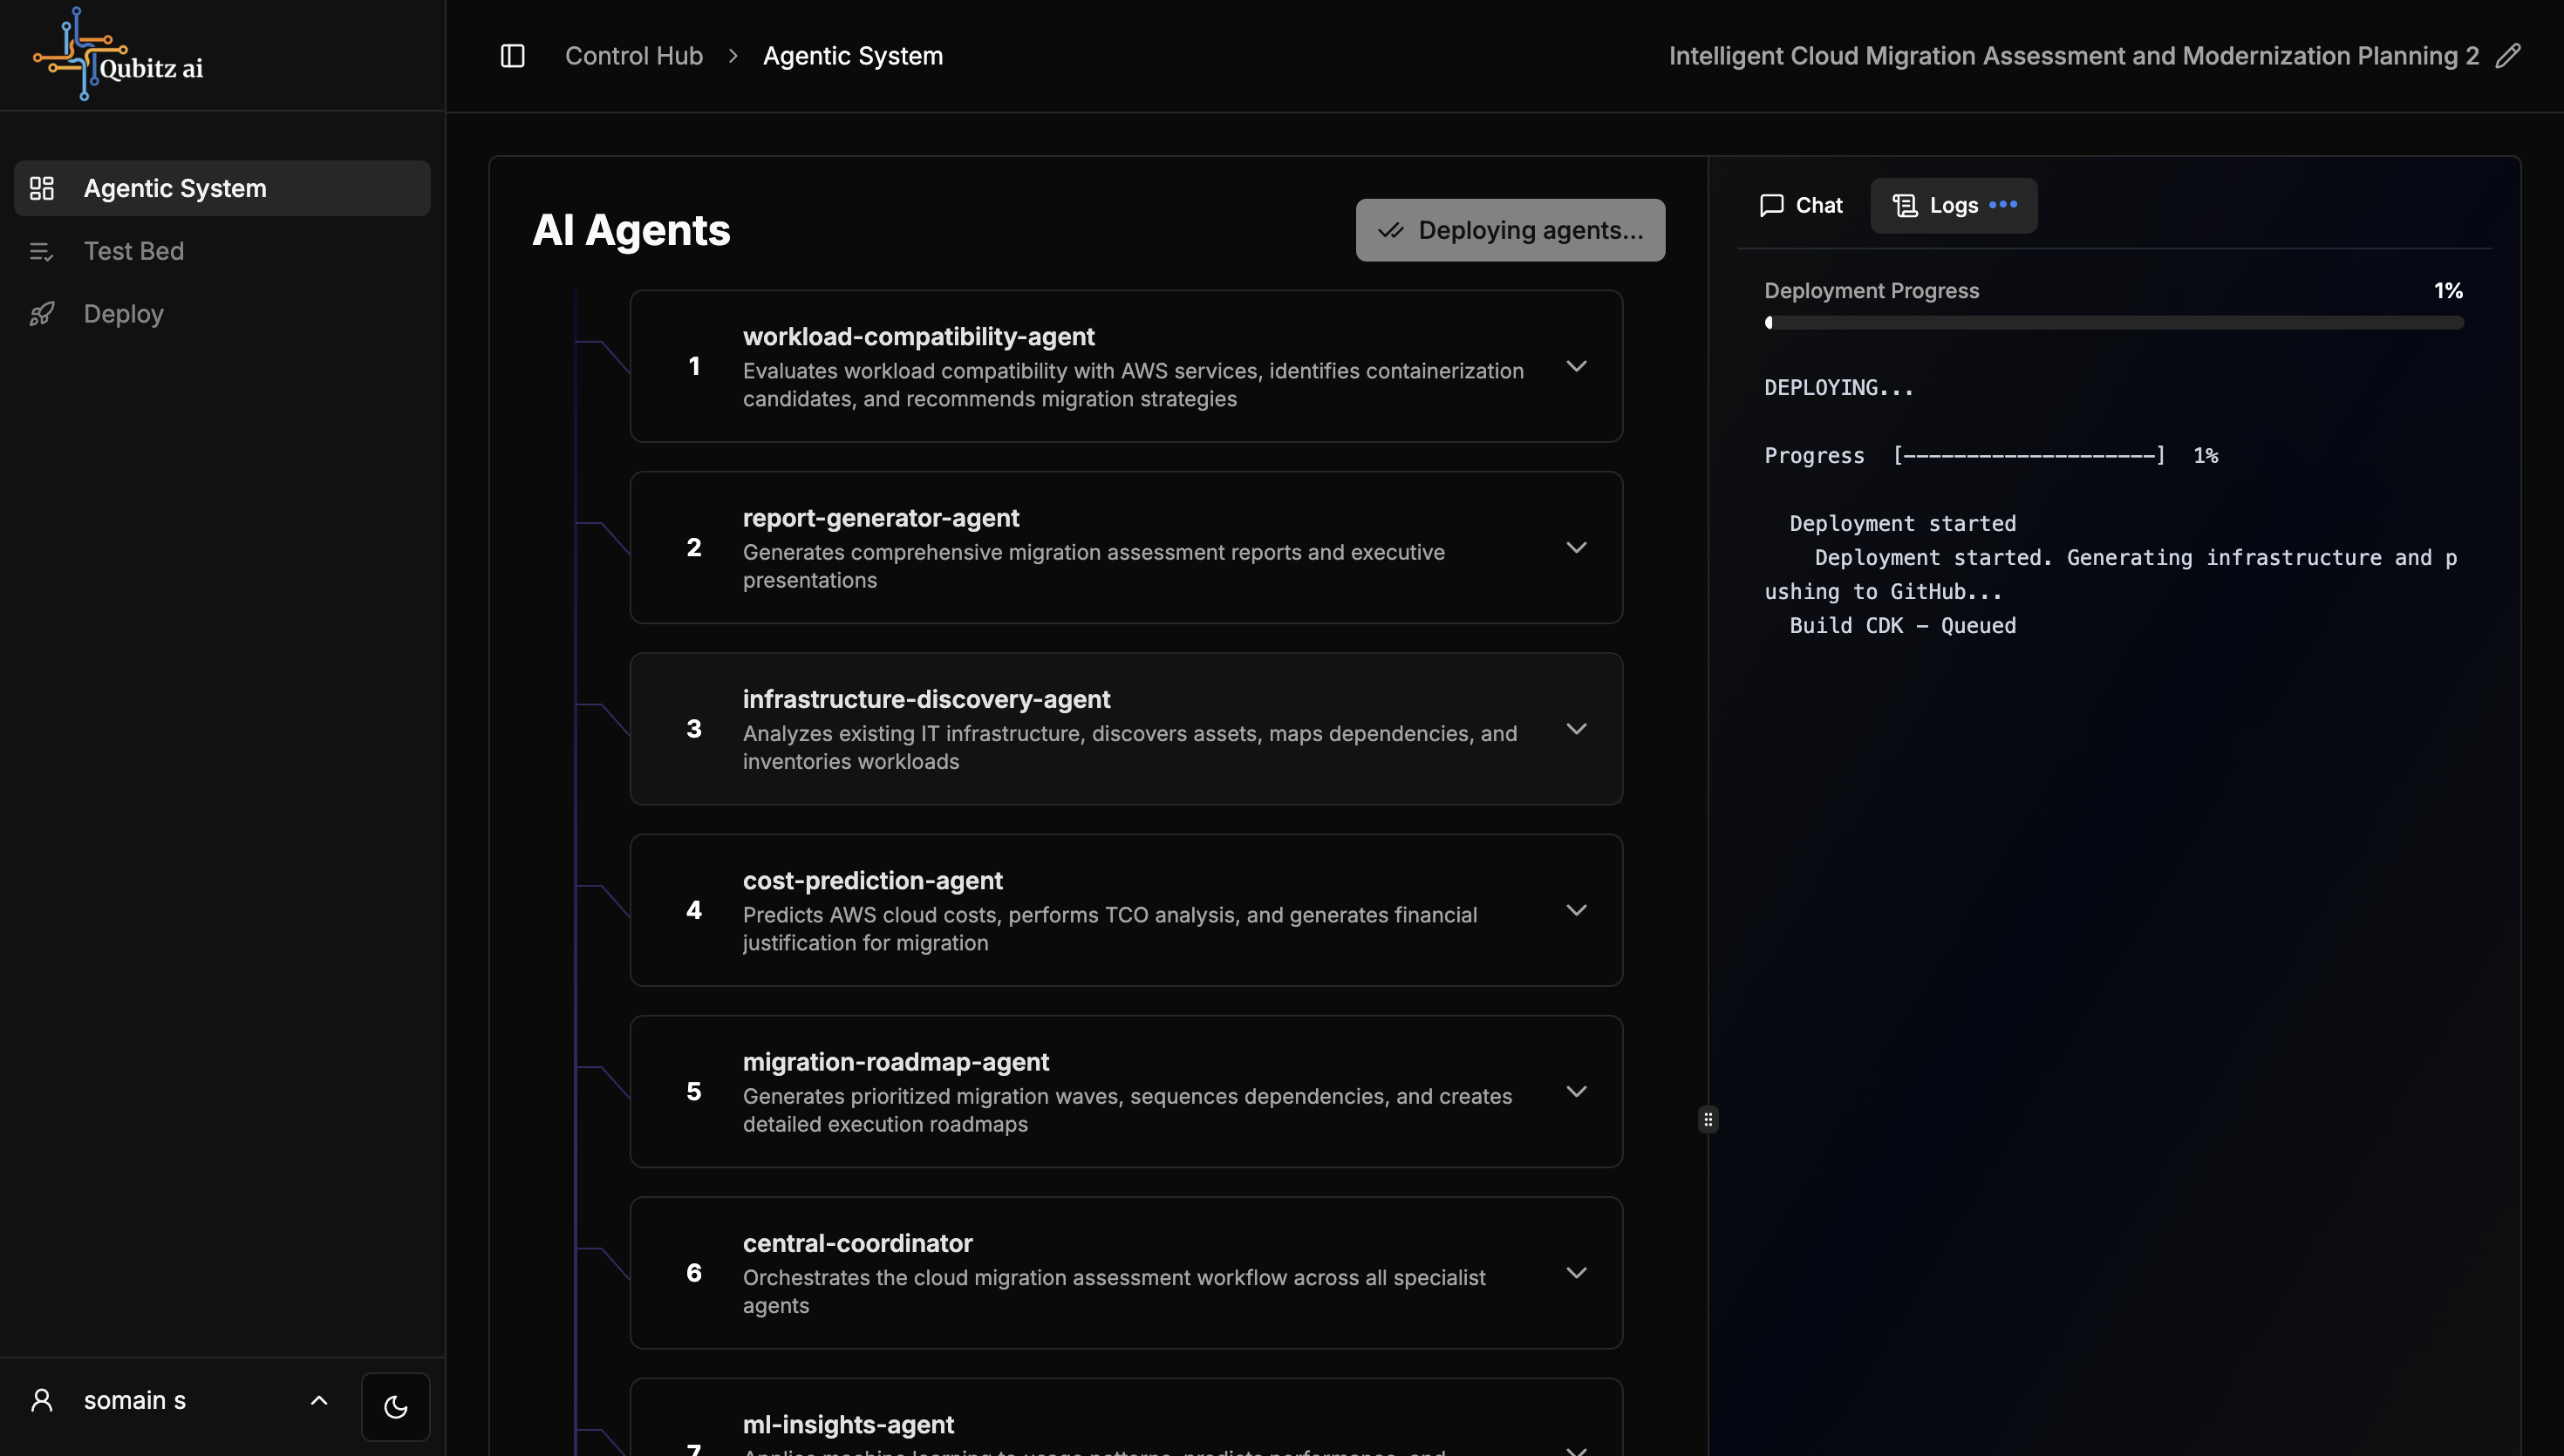
Approve & Deploy Agents
Click Approve. Provide your GitHub username in the credentials dialog and proceed. The deployment provisions your agentic system on AgentCore. Deploy logs stream in real-time.
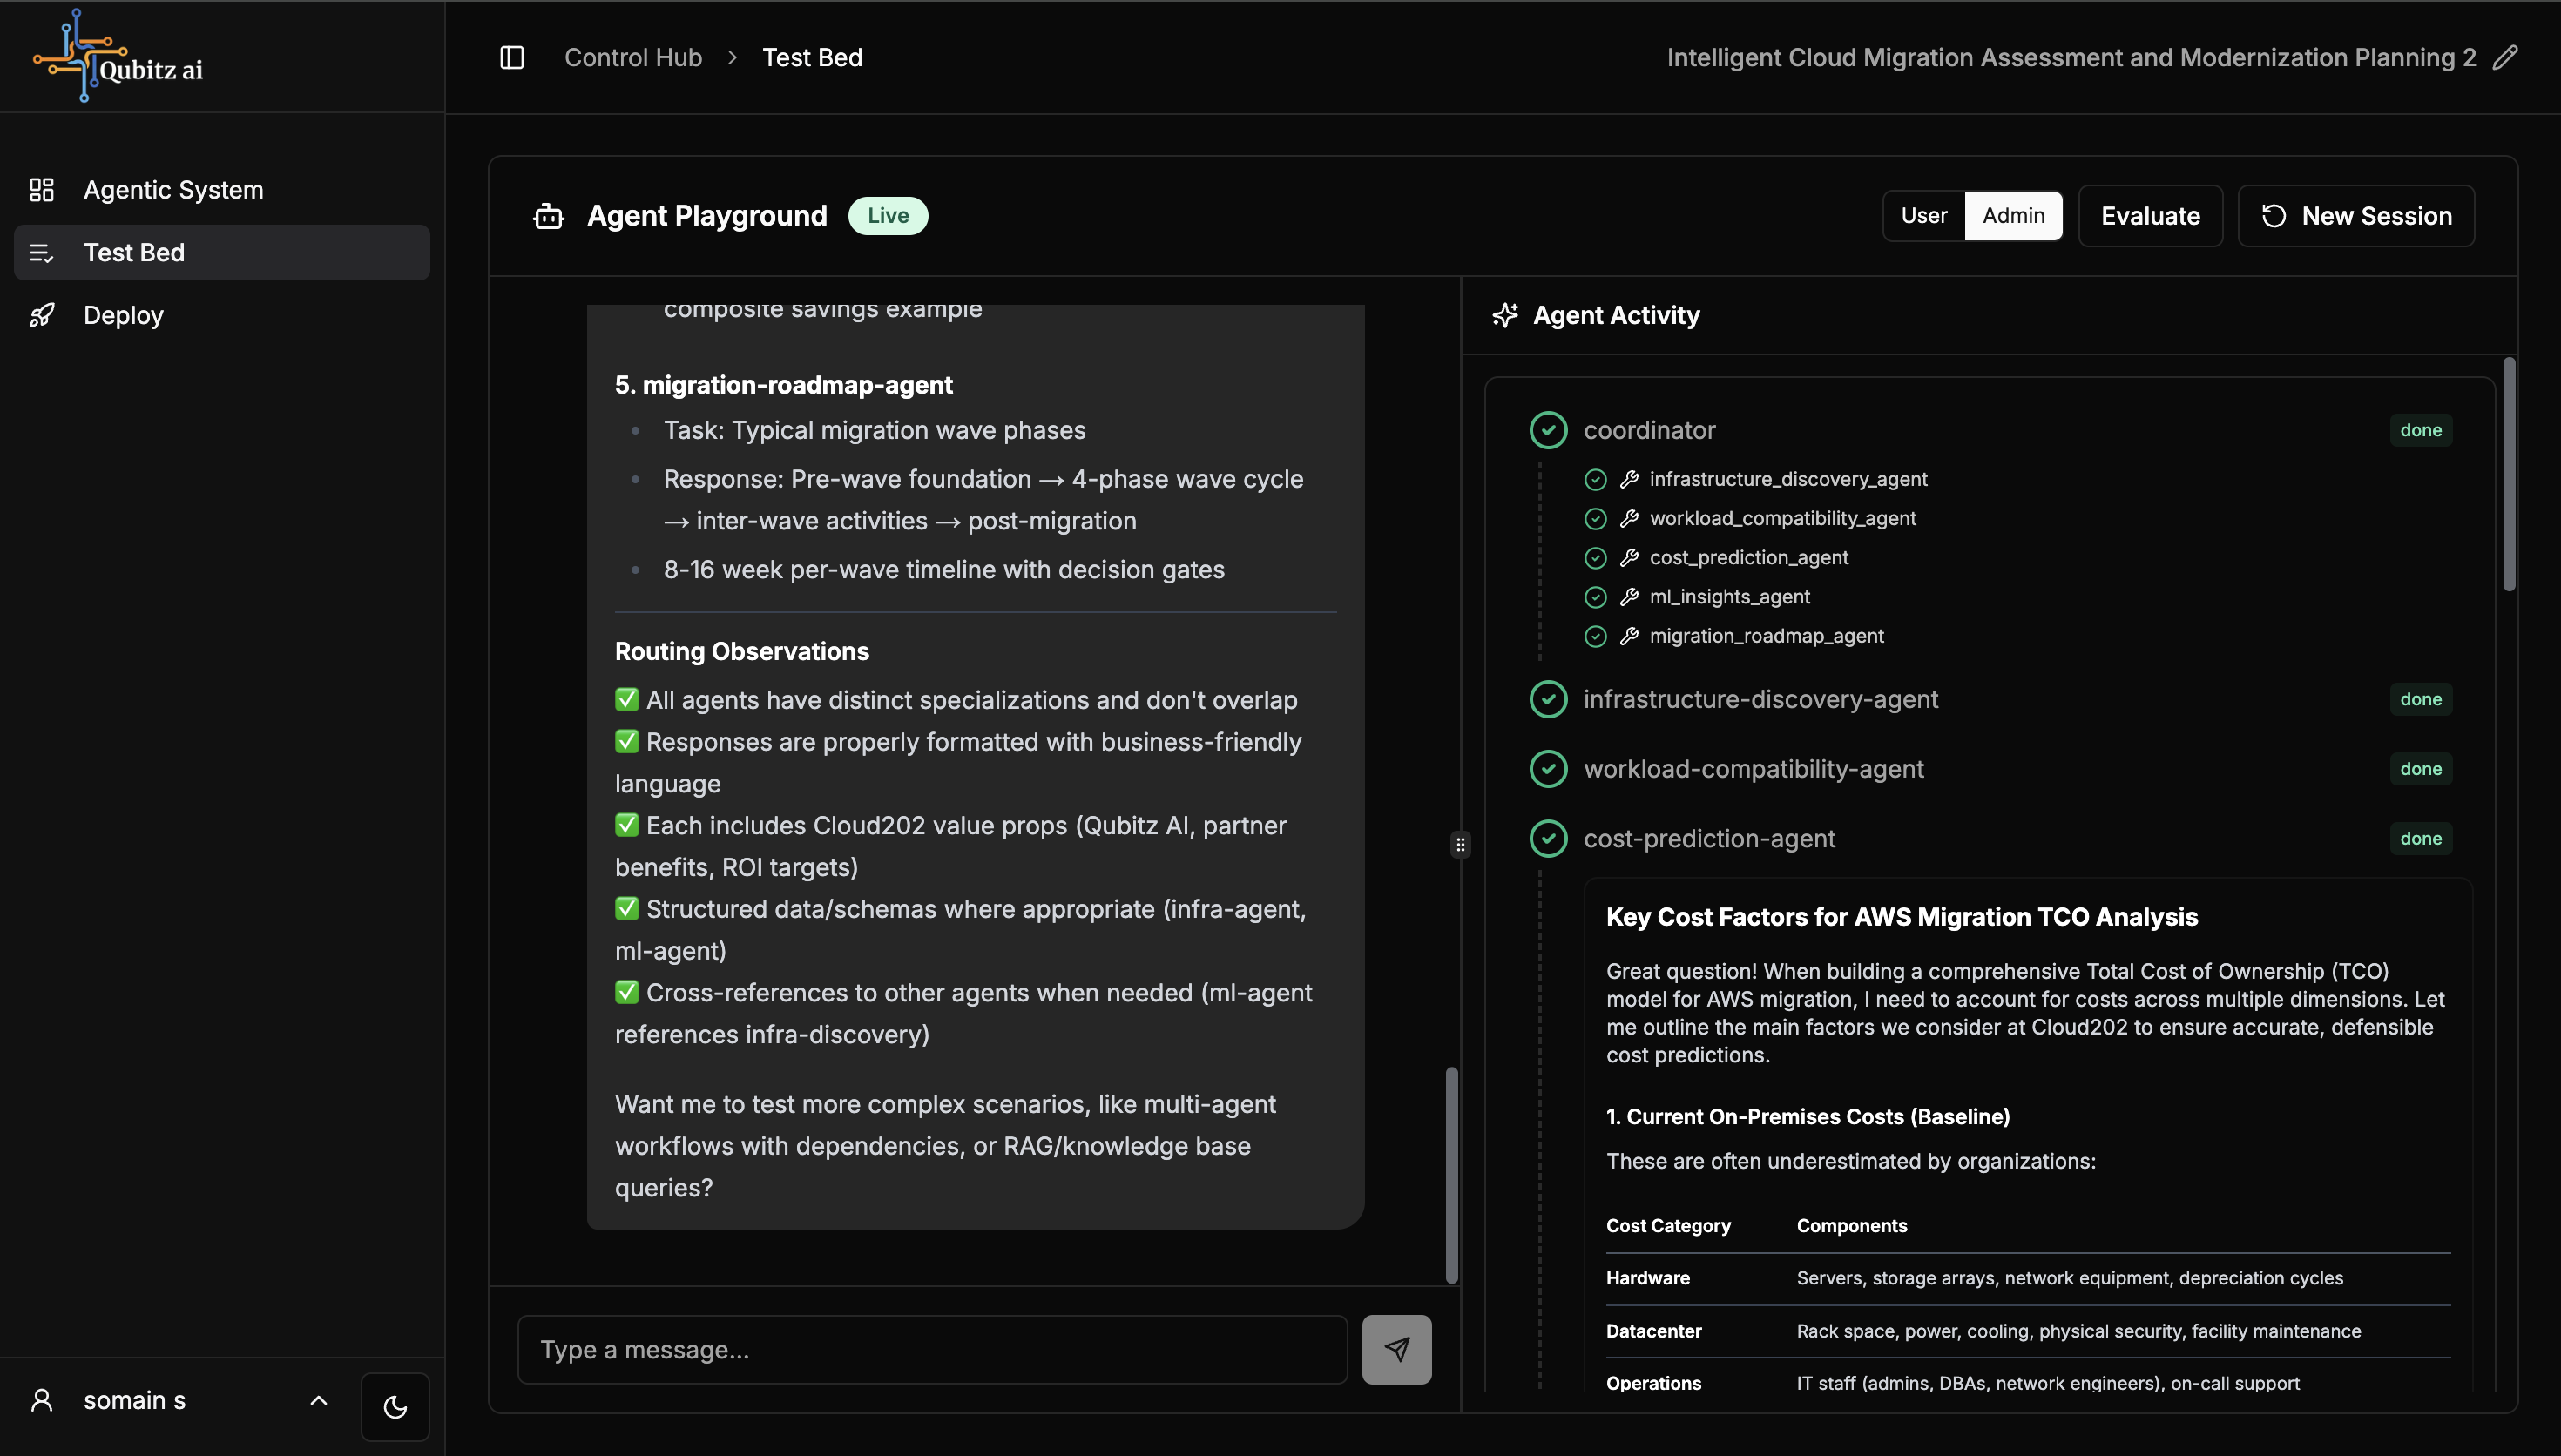
Test Your Agents
Switch to the Test Bed tab. Chat with your deployed agents and monitor the Agent Activity Tree for real-time sub-agent orchestration. Run evaluations across up to 8 metrics to validate agent performance.
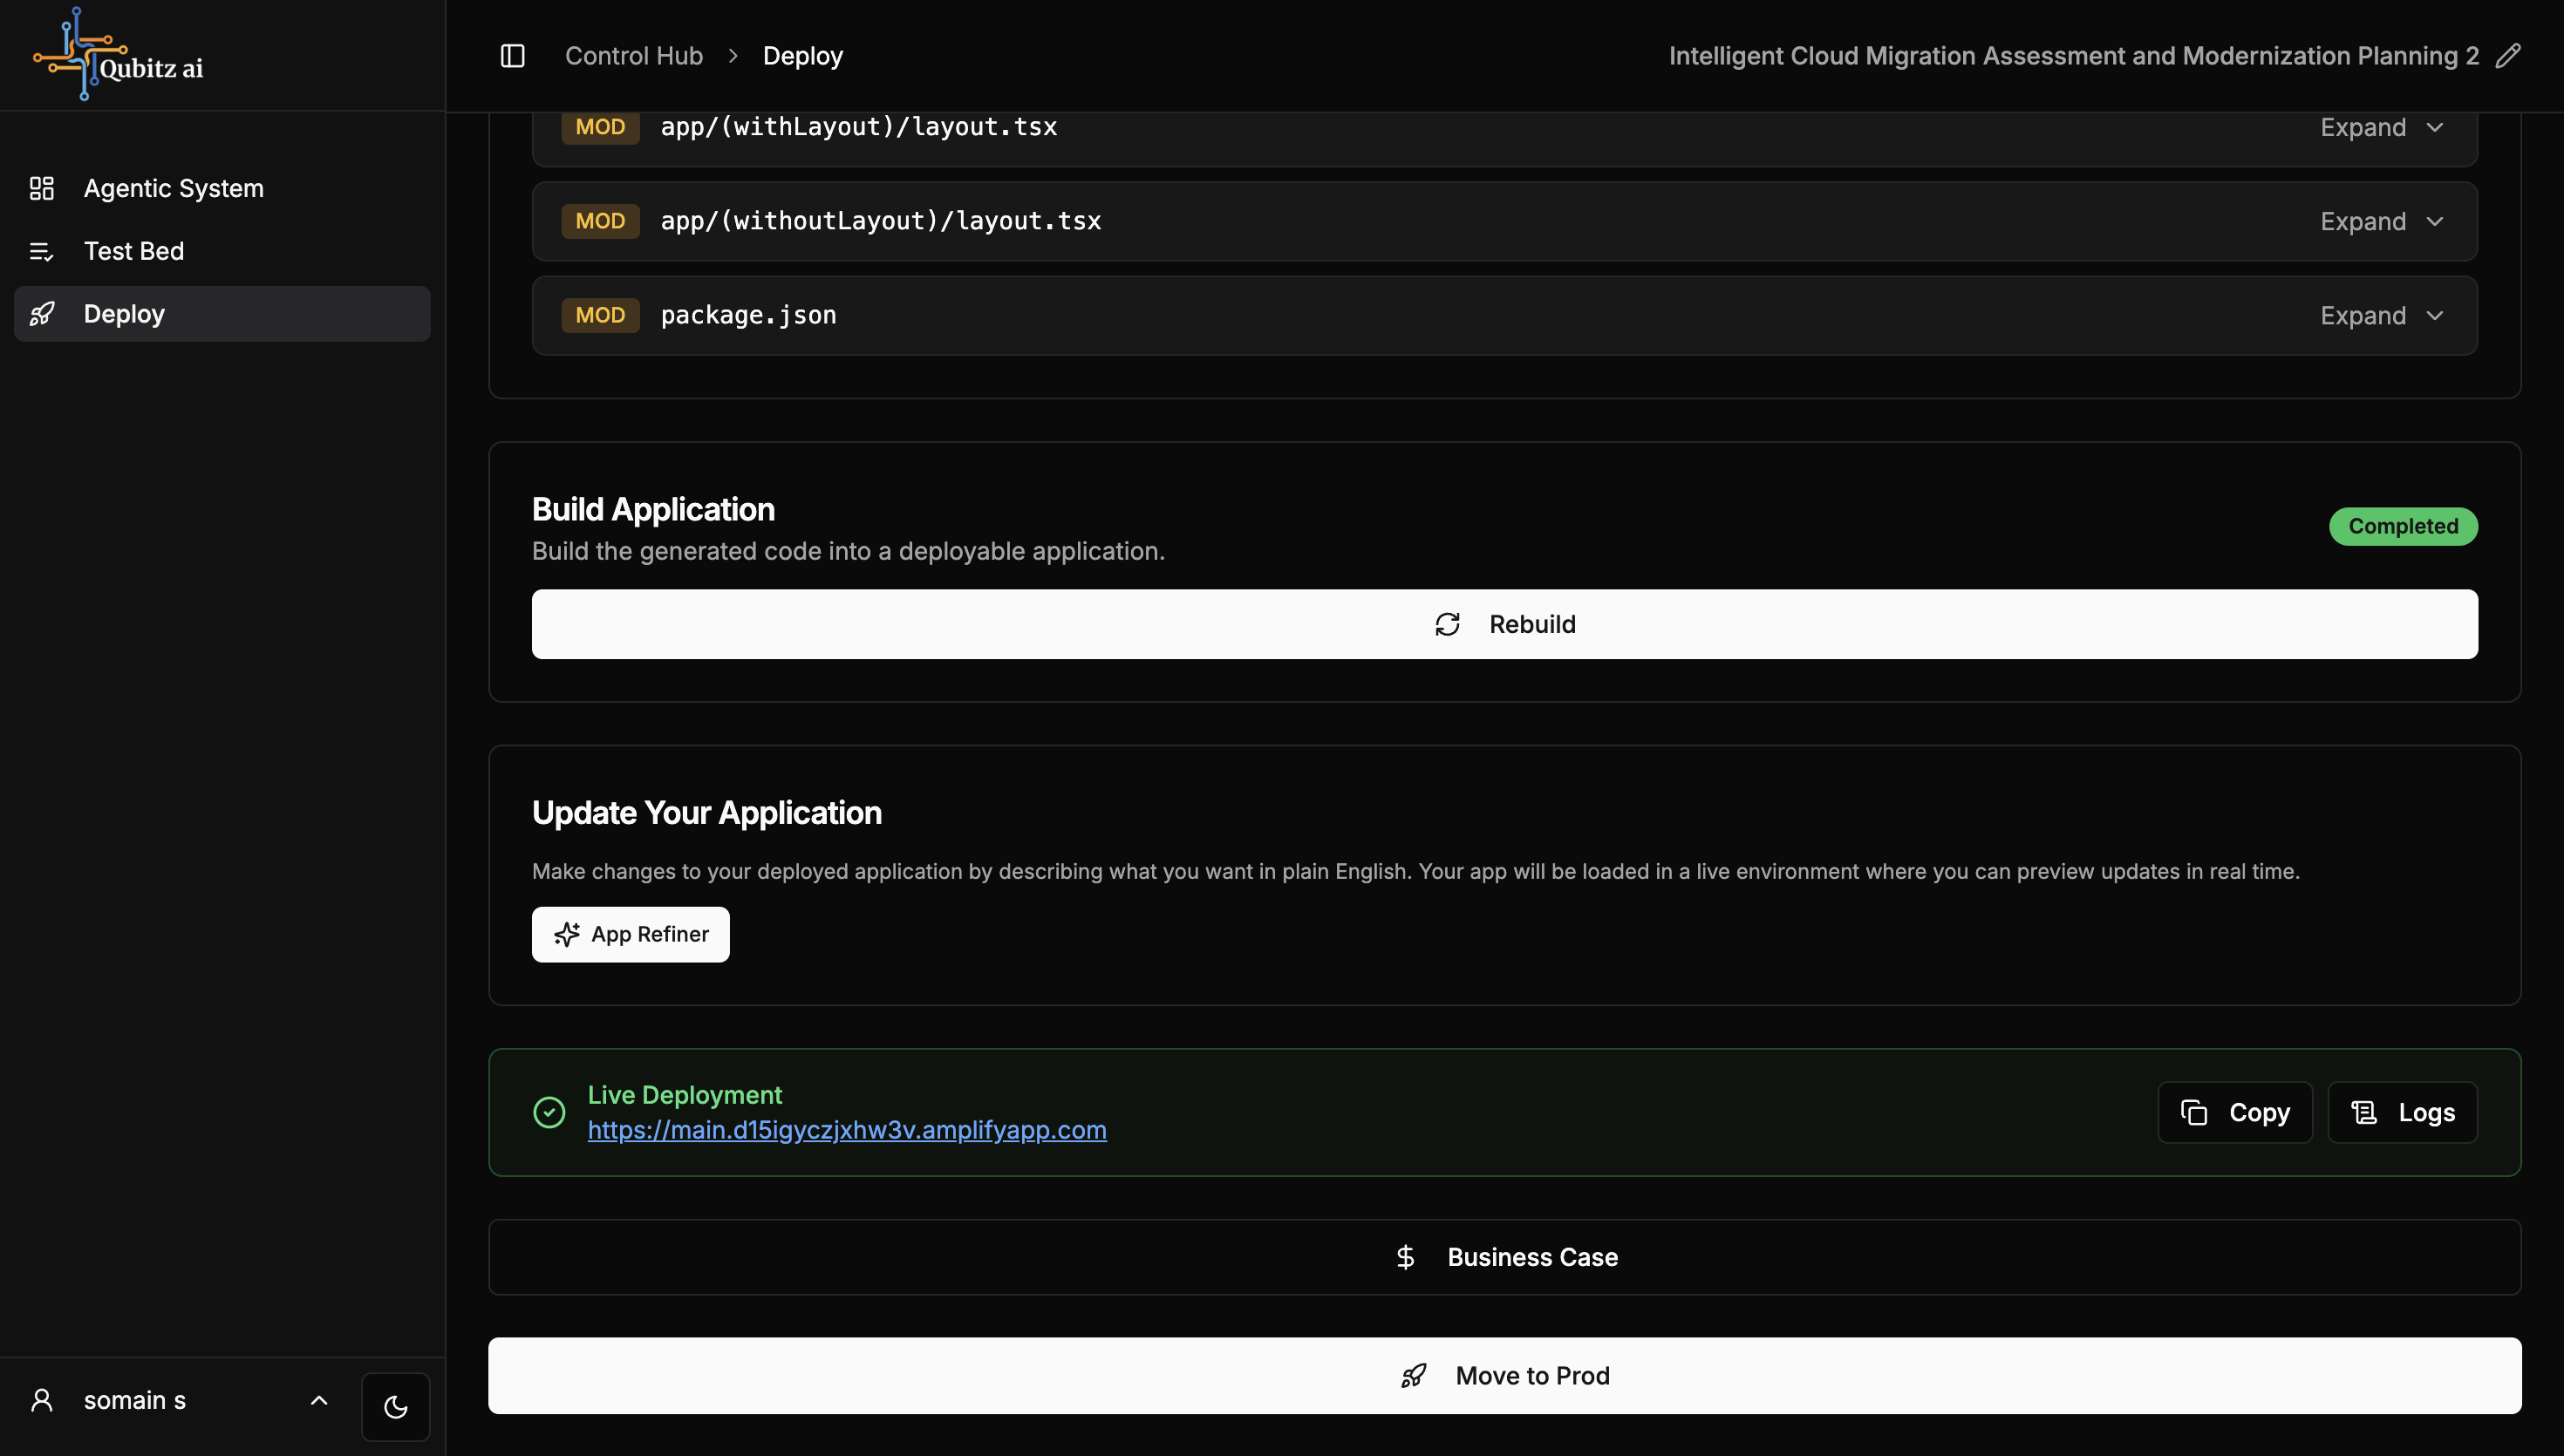
Generate Your Application
Switch to the Deploy tab. Add optional instructions and click Generate App. The system generates code, pushes to GitHub, and Amplify builds it automatically. On success, your live URL is available.
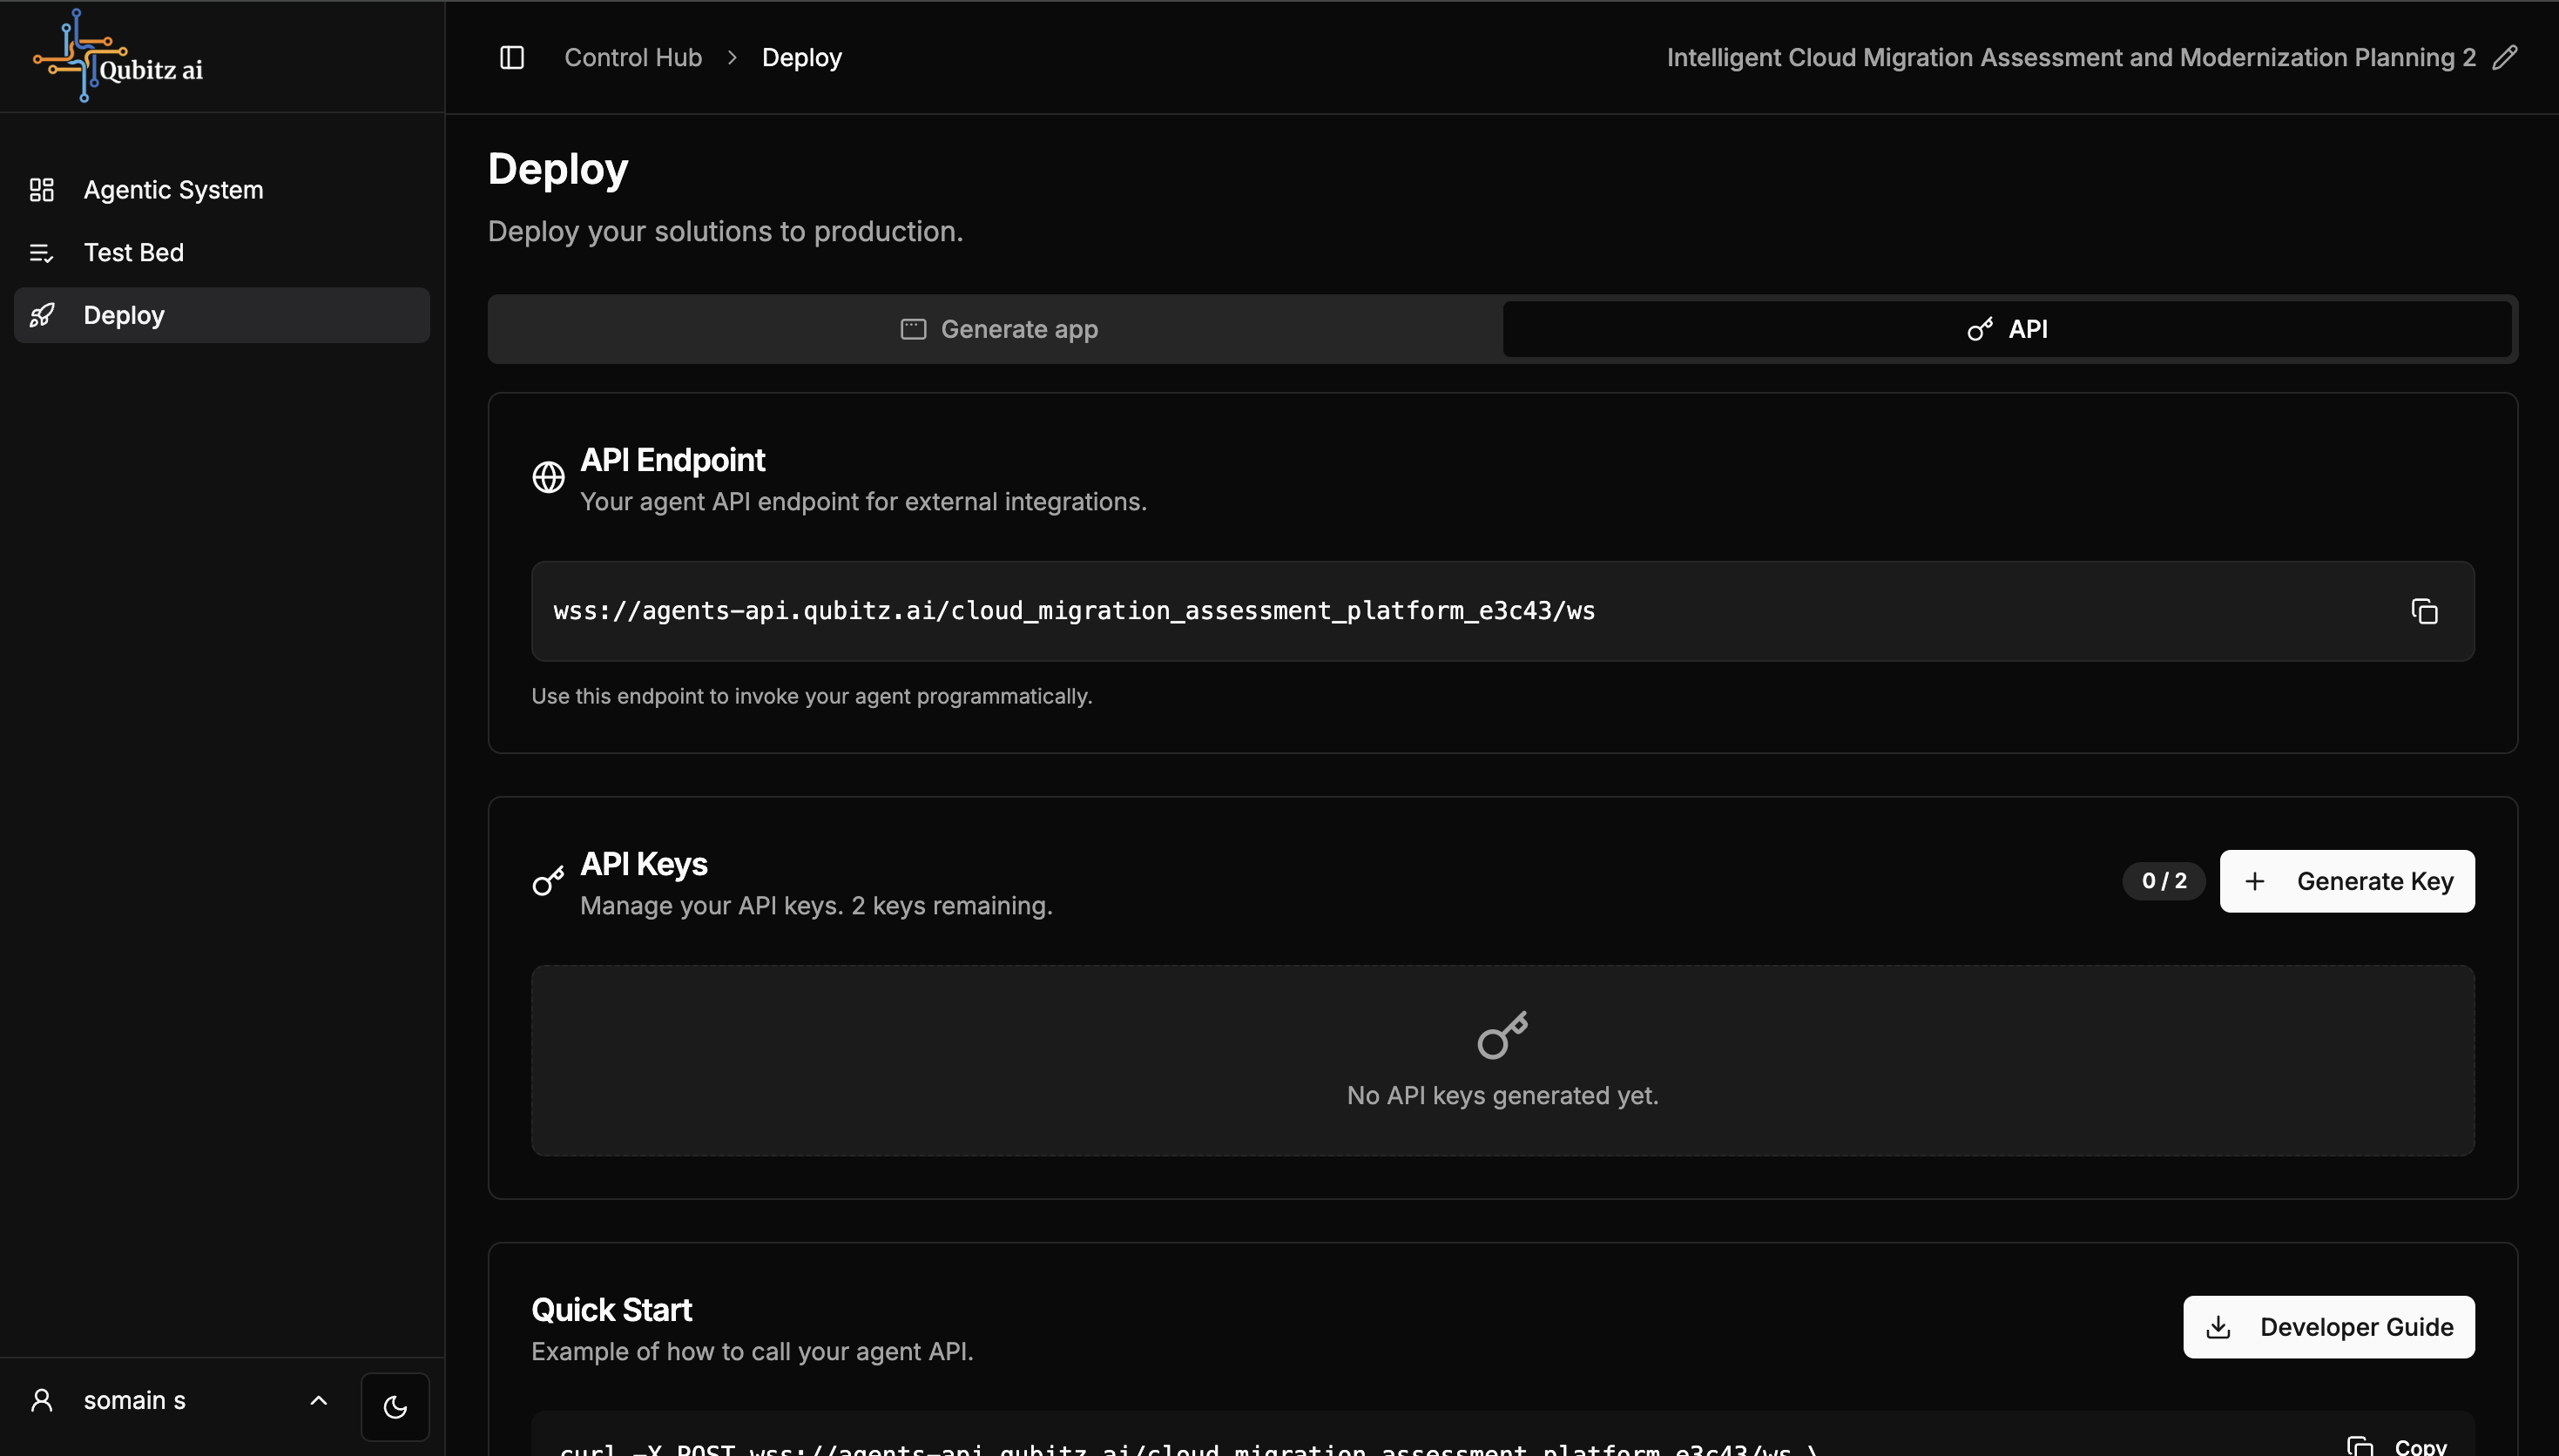
Manage API Access
Switch to the API inner tab. Copy your API endpoint, generate API keys (max 2), and use the Quick Start code example. Generate a Developer Guide for your team.
Move to Production
Select Move to Prod to move your application to production and access the Application Management dashboard.